
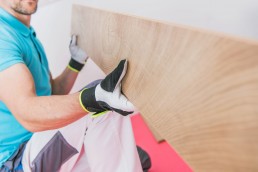
Why LVP is the Best Flooring Choice for Fall and Winter Homes
As the seasons shift and colder weather approaches, homeowners begin preparing their homes for increased indoor activity, wet shoes, and heavy foot traffic. Flooring is one of the most impacted areas during fall and winter, making it essential to choose a material that can withstand seasonal challenges. Luxury Vinyl Plank, or LVP flooring, has become one of the most popular options for homeowners, offering durability, style, and practicality that fits perfectly with fall and winter living.
Durability in Harsh Conditions
Fall and winter bring rain, snow, and salt, all of which can cause significant damage to traditional hardwood or laminate. LVP flooring is designed to be waterproof and resistant to scratches, dents, and stains. This makes it an ideal choice for entryways, kitchens, and living spaces where seasonal messes are most common.
Easy Maintenance During Busy Seasons
With the holidays approaching, homeowners often look for ways to simplify cleaning. LVP flooring requires minimal upkeep compared to other flooring options. Simple sweeping and occasional mopping are usually enough to keep floors looking new, even when guests, kids, or pets track in dirt and debris from outside.
Warm and Stylish Appearance
One of the biggest draws of LVP flooring is its ability to replicate the warm, natural look of hardwood without the high cost or maintenance. In the fall and winter months, when creating a cozy and inviting home is a priority, LVP adds warmth and character to any room. With a wide range of colors and textures, it complements seasonal décor and provides timeless appeal.
Budget-Friendly for Seasonal Renovations
Fall is a popular time for home improvement projects as families prepare for the holidays and colder months ahead. LVP flooring is cost-effective, offering premium style at a fraction of the price of hardwood. Its affordability makes it possible for homeowners to renovate multiple rooms without exceeding their budget.
Comfort Underfoot
During colder seasons, flooring comfort matters more than ever. Many LVP flooring options are designed with added cushioning or can be installed with underlayment for improved insulation and warmth. This creates a comfortable surface underfoot, which is especially welcome in the colder months when families spend more time indoors.
Conclusion
When it comes to preparing your home for fall and winter, choosing the right flooring is key. LVP flooring provides the perfect balance of durability, low maintenance, style, and affordability. Whether you are looking to update your entryway, refresh your living room, or prepare your home for holiday gatherings, LVP flooring is one of the best investments you can make this season.


Fall Checklist: Protecting Your Hardwood Floors Before Winter
As the crisp fall air rolls in and the leaves start to turn, homeowners know one thing for certain—winter is coming. For those with hardwood flooring, the transition between seasons can take a toll if proper care isn’t taken. Between shifting humidity levels, wet boots, and road salt, hardwood floors face unique challenges this time of year.
The good news? With a few preventative steps, you can keep your hardwood floors looking stunning all season long. Here’s your fall checklist for protecting hardwood flooring before winter:
1. Control Indoor Humidity
Hardwood is a natural material that expands and contracts with changes in moisture. As the air dries out in fall and winter, floors can shrink, causing gaps between planks.
-
Aim to keep indoor humidity between 35–55%.
-
Use a humidifier once the furnace is running regularly.
-
Avoid drastic swings in temperature inside your home.
By maintaining steady conditions, you’ll extend the life and beauty of your hardwood flooring.
2. Protect Entryways from Moisture and Dirt
Autumn rains and winter snow bring water, mud, and debris indoors. All of these can dull or damage your hardwood floors.
-
Place high-quality floor mats at every entry.
-
Use boot trays to catch dripping shoes.
-
Sweep or vacuum regularly to prevent dirt and salt from scratching the surface.
Simple prevention at entryways is one of the most effective ways to protect hardwood flooring.
3. Check for Drafts and Seal Gaps
Cold drafts don’t just increase heating bills—they also dry out hardwood floors. Take time this fall to:
-
Seal any gaps around doors and windows.
-
Check baseboards for leaks where cold air can seep in.
-
Consider adding weather stripping to entry doors.
A tighter home helps regulate conditions for your hardwood flooring.
4. Refresh Your Finish
If your floors are looking dull, fall is the perfect time to give them new life before the heavy wear-and-tear of winter.
-
Use a hardwood flooring cleaner—never water and vinegar.
-
Apply a maintenance coat or polish if your finish is wearing thin.
-
For deep scratches or damage, consider scheduling a professional refinish.
A little care now prevents costly repairs later.
5. Use Rugs in High-Traffic Areas
Holiday gatherings and fall entertaining mean more foot traffic. Protect your floors by:
-
Laying down area rugs in dining rooms, hallways, and living rooms.
-
Choosing rugs with breathable pads designed for hardwood flooring.
-
Rotating rugs occasionally to ensure even wear.
Not only do rugs add warmth and style, but they also shield your hardwood floors from scratches and scuffs.
6. Schedule a Professional Inspection
If your hardwood floors are older, now is the time to bring in a professional. A flooring expert can:
-
Check for warping, loose planks, or finish issues.
-
Recommend seasonal maintenance.
-
Ensure your hardwood flooring is ready for the months ahead.
Final Thoughts
Your hardwood flooring is one of the most beautiful features of your home and one of the biggest investments. By following this fall maintenance checklist, you’ll protect your floors from seasonal damage and keep them looking their best through the holidays and beyond.
Whether you need a professional cleaning, refinishing, or even new hardwood installation, fall is the perfect time to act. Don’t wait until winter damage sets in—start protecting your floors today.
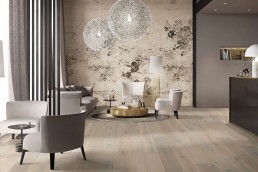
Can You Install LVP Over Tile or Concrete? Here’s What You Need to Know
Luxury Vinyl Plank (LVP) flooring has quickly become one of the most popular choices for homeowners and renovators thanks to its durability, waterproof features, and easy installation. But one of the most common questions people ask before purchasing is:
Can you install LVP over existing tile or concrete?
The short answer is: Yes, you can — but there are a few important things you need to know before starting.
In this guide, we’ll cover:
-
Whether LVP can be installed over tile or concrete
-
What conditions must be met
-
Pros and cons of doing so
-
Step-by-step preparation tips
-
When to consider removing your old floor first
Can You Install LVP Over Tile?
Yes, LVP can be installed directly over ceramic or porcelain tile — as long as the tile is in good condition.
Requirements:
-
The tiles must be level and securely fixed (no loose tiles)
-
Grout lines should be no deeper than 1/8 inch
-
The floor must be clean, dry, and free of debris
Tips:
-
Use a self-leveling compound to fill deep grout lines or uneven areas
-
A thin underlayment can help with minor imperfections and soundproofing
Important: If your tile is uneven or cracked, those flaws can telegraph through the LVP over time.
Can You Install LVP Over Concrete?
Yes, LVP is one of the best flooring types for concrete subfloors, especially in basements or slab-on-grade homes.
Requirements:
-
Concrete must be fully cured, level, and moisture-tested
-
Surface must be free of cracks, adhesives, or residue
-
Moisture content should meet manufacturer guidelines (often ≤ 75% RH)
Tips:
-
Use a vapor barrier under your LVP to prevent moisture damage
-
Consider applying a concrete sealer if moisture is a concern
-
For older concrete, repair cracks or use a patching compound
Floating vs Glue-Down Installation
The method you use can affect whether tile or concrete is a good base.
| Method | Works Over Tile? | Works Over Concrete? | Notes |
|---|---|---|---|
| Floating (Click-Lock) | Yes | Yes | Most DIY-friendly option |
| Glue-Down | Not ideal | Yes (if porous) | Requires smooth, absorbent surface |
If you plan to float your LVP, a smooth and stable base is crucial. If glue-down is preferred, ensure the surface can accept adhesive.
Pros of Installing LVP Over Existing Floors
-
Saves Time and Money: No need to rip up old tile or prep raw concrete
-
Less Mess: Avoids demolition, especially with dusty tile tear-outs
-
Adds Insulation: Existing tile or concrete can help with thermal insulation
-
Faster Turnaround: Especially useful in rentals or tight timelines
Cons and Risks to Consider
-
Increased Floor Height: May affect door clearance, trim, or transitions
-
Subfloor Imperfections Show: Any unevenness will show over time if not corrected
-
Possible Moisture Issues: Especially with concrete or if installing in a basement
-
Warranty Concerns: Not following manufacturer prep guidelines could void warranty
How to Prepare Your Floor for Luxury Vinyl Flooring Installation
Step-by-step guide:
-
Inspect the surface
Check for cracks, loose tiles, moisture, or uneven spots. -
Clean thoroughly
Vacuum and wash the floor to remove dust, grease, or adhesives. -
Level and patch
Use a self-leveling compound or patching mix where needed. -
Test for moisture (concrete only)
Use a calcium chloride or RH test to confirm acceptable levels. -
Install underlayment (if required)
Depending on your LVP and subfloor, use an appropriate underlayment or vapor barrier. -
Acclimate your flooring
Let Luxury Vinyl Flooring planks sit in the room for 48 hours to adjust to temperature and humidity. -
Begin your installation
Follow manufacturer guidelines based on click-lock or glue-down method.
When Should You Remove the Old Floor Instead?
You should consider removing tile or prepping concrete more aggressively if:
-
Tiles are cracked, loose, or unlevel
-
The subfloor is extremely uneven
-
Moisture levels are too high
-
You’re installing a glue-down Luxury Vinyl Flooring that requires a flat, porous surface
Final Thoughts
Installing LVP over tile or concrete is not only possible, but it's also one of the most efficient ways to upgrade your flooring without the hassle of full demolition. With proper preparation, you can achieve a beautiful, durable, and cost-effective result that will last for years.
If you’re unsure about the condition of your existing floor or want help selecting the right Luxury Vinyl Flooring for your subfloor type, consult a flooring expert before you begin.
Need Help With Your Luxury Vinyl Flooring Project?
We offer free in-home consultations and expert advice on Luxury Vinyl Flooring installation over tile or concrete. Our team can assess your floor and help you choose the perfect plank for your space and budget.
Contact us today or stop by our showroom to explore the latest styles and installation options.
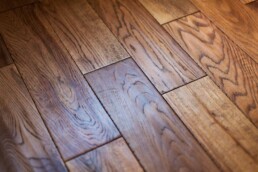
Hardwood Floors Stains: How to Pick the Perfect Tone for Your Space
When it comes to designing your dream home, few decisions have as much visual impact as the color of your hardwood floors. The right stain can dramatically transform a room — adding warmth, sophistication, or a sleek modern vibe. But with so many options available, how do you pick the perfect hardwood floor stain for your space?
In this guide, we’ll walk you through:
-
Popular stain color categories
-
Factors to consider when choosing a stain
-
Room-by-room suggestions
-
Pro tips for testing before you commit
Whether you're refinishing existing hardwood or installing new flooring, these insights will help you choose the best stain color to complement your home.
Popular Hardwood Floors Stain Colors
1. Natural and Clear Finishes
-
Look: Light, raw, and minimal
-
Best for: Small rooms or Scandinavian-style interiors
-
Works well on: White oak, maple
-
Pairs with: White walls, soft neutrals, light furniture
2. Warm Honey and Golden Tones
-
Look: Classic and cozy with a golden glow
-
Best for: Traditional, farmhouse, or rustic styles
-
Works well on: Red oak, pine
-
Pairs with: Earth tones, beige, and antique decor
3. Medium Browns
-
Look: Timeless and versatile with a rich undertone
-
Best for: Open-concept or transitional spaces
-
Works well on: Walnut, white oak
-
Popular stains: Provincial, Early American, Special Walnut
4. Dark Espresso and Mocha Tones
-
Look: Elegant and dramatic
-
Best for: Large spaces or contemporary styles
-
Caution: Can show dust, scratches, and pet hair
-
Pairs with: Bright whites, bold color schemes
5. Gray and Greige Tones
-
Look: Cool, modern, and urban
-
Best for: Coastal homes, modern condos, or lofts
-
Popular stains: Classic Gray, Weathered Oak
-
Works best on: White oak for an even finish
6. Custom and Mixed Stains
-
Look: Tailored and unique
-
Best for: Homeowners seeking a one-of-a-kind look
-
Note: Often involves blending multiple stains or water-popping techniques
How to Choose the Right Hardwood Floors Stain
Choosing a hardwood stain is about more than color preference — it’s about how the tone fits your space, lifestyle, and design goals. Consider the following:
1. Room Size and Natural Light
-
Light stains help small rooms feel larger and brighter
-
Dark stains add contrast but may make a space feel smaller
-
Use mid-tones to balance bright light or high ceilings
2. Wall Colors and Interior Design Style
-
Warm-toned stains pair well with creams, browns, and traditional décor
-
Cool-toned stains match modern, industrial, or coastal styles
-
Neutral stains allow flexibility if you change décor frequently
3. Wood Species
-
Different woods absorb stains differently
-
Red oak may pull red or pink tones
-
White oak offers a more neutral base for gray or cool tones
-
Maple and birch may absorb stain unevenly
4. Lifestyle and Maintenance
-
Dark stains tend to highlight scratches, dust, and pet hair
-
Lighter stains are generally easier to maintain
-
Matte finishes are more forgiving than glossy ones
Always Test Before You Stain
Never rely solely on sample boards or online images. Always test stains on your actual wood floor. Here's why:
-
Your wood’s grain, age, and type all affect stain absorption
-
Apply three to four test swatches in an inconspicuous area
-
View the samples in different lighting conditions throughout the day
-
Let the stain fully dry to see its final appearance
Tip: Water-popping the wood (applying water before staining) can intensify the color but will also make the wood more absorbent — test accordingly.
Room-by-Room Hardwood Floors Stain Suggestions
| Room | Recommended Stain Tone | Reason |
|---|---|---|
| Living Room | Medium or dark brown | Warm, inviting atmosphere |
| Kitchen | Natural or light brown | Bright, clean look; hides crumbs |
| Bedroom | Warm honey or greige | Calming, restful tone |
| Hallways | Light to medium tone | Conceals dirt and scuffs well |
| Basement | Mid-tone or gray (engineered) | Enhances low-light areas with a modern feel |
Final Thoughts: Matching Your Floors to Your Life
Your hardwood floor stain sets the tone for your entire space. Choosing the right color depends on more than just current trends — it's about how the tone complements your home’s lighting, layout, existing design, and how you live day to day.
By understanding the stain options and testing carefully, you’ll be able to achieve a look that enhances both the style and function of your space for years to come.
Need Help Choosing the Perfect Stain?
Our flooring experts offer personalized consultations and in-home sampling to help you find the ideal stain for your hardwood floors. Contact us today to schedule a visit or stop by our showroom.
How LVP Flooring Holds Up in the Intense Summer Heat
When temperatures soar and humidity peaks during the summer months, many homeowners worry about how their flooring will react. The good news? LVP flooring—short for Luxury Vinyl Plank—is built to handle tough conditions, including the intense heat of summer.
Whether you’re renovating your home or just looking to make your floors more summer-resistant, here’s why LVP flooring is one of the best choices you can make—and how to keep it looking great all season long.
What Is LVP Flooring?
LVP flooring mimics the natural look of hardwood or stone, but it’s made from multiple synthetic layers designed for maximum durability. It’s water-resistant, scratch-resistant, and, most importantly for summer—heat-tolerant.
1. Heat Resistance Built In
Unlike solid hardwood, which can expand and contract with temperature changes, most LVP flooring is manufactured with a stable core layer that resists warping in high temperatures.
Tip:
When shopping for LVP, choose products with a rigid core (SPC or WPC core technology) for the best performance in hot environments.
2. No Fading or Discoloration
Prolonged sun exposure can cause fading in some types of flooring, but high-quality LVP flooring often comes with a UV-resistant wear layer that protects against discoloration.
Tip:
Still, it’s smart to use curtains or blinds in rooms that get a lot of direct sunlight—especially in areas with floor-to-ceiling windows or patio doors.
3. Water and Humidity Resistant
Summer means humidity and the occasional wet mess—whether from summer storms or kids running inside after playing with the sprinkler. Unlike wood or laminate, LVP flooring can handle moisture without swelling or buckling.
Tip:
For extra protection, consider 100% waterproof LVP flooring, especially in kitchens, basements, and bathrooms.
4. Easy Summer Maintenance
Heat means more dust, dirt, and outdoor debris making its way into your home. Fortunately, LVP flooring is a breeze to clean.
Tip:
Sweep or vacuum regularly, and mop with a vinyl-safe cleaner. Avoid abrasive tools or harsh chemicals that might degrade the wear layer over time.
5. Comfortable Underfoot—even When It’s Hot
Some flooring types get hot to the touch in the summer, especially near windows. LVP flooring stays relatively cool and soft underfoot, making it comfortable for barefoot walks around the house.
Tip:
If your home gets exceptionally hot, you can pair LVP with a radiant barrier or underlayment to help regulate surface temperature even more.
6. Ideal for Cottages, Sunrooms, and Cabins
Because of its ability to withstand heat and moisture, LVP flooring is perfect for seasonal homes or rooms that may not be climate-controlled year-round.
Tip:
If installing in an area with extreme temperature swings, confirm with your installer or manufacturer that your product is rated for those conditions.
Final Thoughts
Whether you're enduring a heat wave or enjoying a breezy summer afternoon, LVP flooring stands up to the challenge. With its unmatched durability, heat resistance, and low-maintenance appeal, it’s no surprise that more homeowners are choosing LVP as their go-to summer-ready flooring option.
Ready to upgrade? Explore our collection of LVP flooring styles and find the perfect fit for your home today.
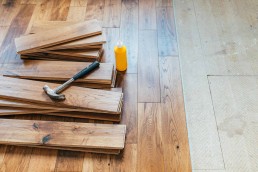
How to Keep Your Hardwood Flooring Looking Good During Hot Summers
Summer heat can be brutal—not just for you, but for your hardwood flooring as well. With rising temperatures and increased humidity, summer can cause hardwood floors to expand, fade, or even warp if not properly cared for. Luckily, a few proactive steps can keep your hardwood floors looking beautiful and lasting for years to come.
Here’s how to protect your hardwood flooring from the summer heat.
1. Control Indoor Humidity
Wood is a natural material that responds to environmental changes. In high humidity, hardwood absorbs moisture, causing it to swell. In dry heat, it can contract and create gaps between planks.
Tip:
Invest in a humidifier and dehumidifier system to keep indoor humidity between 35% and 55%. Smart thermostats with humidity controls are a great way to monitor conditions year-round.
2. Keep Floors Cool and Covered
Prolonged exposure to direct sunlight can fade and discolor hardwood flooring, especially in rooms with large windows.
Tip:
Use curtains, blinds, or UV-blocking window films during peak sunlight hours. Consider adding area rugs in high-sunlight zones to protect the wood while enhancing your home’s aesthetic.
3. Clean Regularly and Wisely
Summer often means more outdoor activity, which can track dust, dirt, and moisture into your home—all of which can damage hardwood over time.
Tip:
Sweep or dry mop daily to remove grit. Use a damp mop weekly (not wet!) with a hardwood-safe cleaner. Avoid steam mops or excess water—they can cause long-term damage to wood floors.
4. Use Protective Pads and Rugs
Summer gatherings and kids home from school often lead to increased foot traffic and movement of furniture.
Tip:
Place felt pads under furniture and add rugs in busy areas like hallways and entryways. This prevents scratches and keeps your hardwood flooring looking flawless.
5. Maintain Proper Ventilation
Air circulation helps regulate temperature and moisture levels, reducing stress on your hardwood.
Tip:
Use ceiling fans and open windows in the cooler parts of the day. If you use air conditioning, make sure vents are unobstructed and filters are changed regularly to maintain air quality and circulation.
6. Schedule Professional Maintenance
If your floors are looking dull or worn despite regular care, it might be time for a professional touch.
Tip:
Have a hardwood flooring expert inspect and, if needed, recoat or refinish your floors. Summer is a great time to schedule maintenance when the air is dry and curing times are faster.
Final Thoughts
Keeping your hardwood flooring in top shape during summer doesn’t require a complete lifestyle change—just a little attention and regular care. By managing heat, humidity, and sunlight, you can enjoy gorgeous floors all year long.
Looking for professional help? Contact our team at Focus Flooring for expert hardwood flooring advice, refinishing, or new installations tailored to your home.
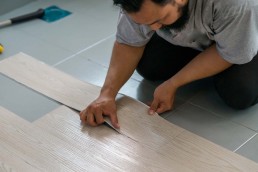
Where Should You (and Shouldn’t You) Install LVP Flooring?
Luxury Vinyl Plank (LVP) flooring has exploded in popularity thanks to its durability, affordability, and realistic wood-look design. But while LVP is marketed as a “do-it-all” flooring solution, the truth is—it’s not perfect for every room or condition.
In this guide, we’ll break down exactly where you should (and shouldn’t) install LVP flooring, so you can make the best decision for your home or property.
Where You Should Install LVP Flooring
1. Living Rooms & Bedrooms
Why it works:
LVP provides a warm, wood-look finish that’s soft underfoot and perfect for everyday use. It’s scratch-resistant and great for homes with kids or pets.
💡 Bonus: Many homeowners choose LVP over hardwood for its lower cost and easier maintenance.
2. Kitchens
Why it works:
LVP is water-resistant (often waterproof) and can withstand occasional spills, dropped dishes, and high traffic. Unlike real hardwood, it won’t warp from everyday kitchen moisture.
💡 Pro tip: Look for LVP with a wear layer of at least 12 mils for kitchen durability.
3. Bathrooms
Why it works:
Because of its waterproof core (SPC or WPC) and tight click-lock seams, LVP is a great alternative to tile in bathrooms. It won’t absorb moisture or promote mold growth underneath.
🚫 Watch out: Avoid using LVP in bathrooms without proper ventilation or where standing water may sit for long periods.
4. Laundry Rooms & Mudrooms
Why it works:
These utility spaces deal with high humidity and potential leaks—areas where traditional hardwood would fail. LVP handles moisture and impact exceptionally well.
5. Finished Basements
Why it works:
Basements are notorious for moisture issues and temperature swings. Engineered LVP flooring won't warp or buckle like hardwood or laminate. It’s a solid choice for finished lower levels.
🔧 Installation tip: Use an underlayment with a built-in vapor barrier if installing over concrete.
6. Pet-Friendly Homes
Why it works:
LVP resists scratches from claws, is easy to clean, and doesn’t trap pet odors. It's an excellent surface for households with dogs or cats.
Where You Shouldn’t Install LVP Flooring
🌧 1. Outdoors or Unheated Spaces
Why not:
LVP is not rated for direct outdoor use, such as decks or porches. It also isn’t suitable for unheated sunrooms or garages where temperatures can drop below freezing or rise above 120°F.
2. Subfloors with High Moisture (Without Prep)
Why not:
LVP is water-resistant, not invincible. If you install it over a wet concrete slab or an unsealed crawlspace, you risk trapped moisture, mold, or adhesive failure.
🧰 Solution: Use a moisture barrier and test for vapor emissions before installation.
3. Around Fireplaces or Near Heat Vents (Excessive Heat)
Why not:
While LVP is heat-tolerant, direct or prolonged exposure to high temperatures (e.g., next to a wood-burning stove or floor registers with no deflector) may cause discoloration or warping.
4. Commercial Kitchens or Industrial Areas
Why not:
Even though LVP is durable, it's not designed for extreme heat, grease, or heavy rolling loads. These spaces often require commercial-grade tile or epoxy flooring instead.
Quick Reference: LVP Installation Guide
| Room / Space | Recommended? | Notes |
|---|---|---|
| Living Room | ✅ Yes | Great residential use |
| Bathroom | ✅ Yes | Waterproof LVP preferred |
| Kitchen | ✅ Yes | Choose durable wear layer |
| Basement (Finished) | ✅ Yes | Use vapor barrier |
| Outdoor Deck | ❌ No | Use tile or composite decking |
| Garage (Unheated) | ❌ No | Consider sealed concrete or tile |
| Laundry Room | ✅ Yes | Moisture-resistant option |
| Commercial Kitchen | ❌ No | Requires heavy-duty flooring |
Final Thoughts: Is LVP Flooring Right for Your Space?
LVP flooring is incredibly versatile, but like any product, it has its limits. It’s ideal for most residential settings, especially high-moisture and high-traffic areas. Just be cautious when using it in unheated, outdoor, or industrial environments.
Still unsure if LVP will work in your space? Our flooring experts are here to help you find the perfect solution for your lifestyle and budget.
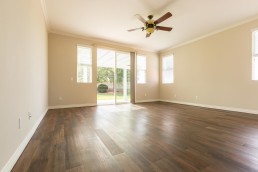
Engineered vs. Solid Hardwood Flooring: Which One Is Right for You?
When it comes to choosing hardwood flooring, one of the biggest decisions homeowners face is: engineered hardwood or solid hardwood? Both offer the timeless beauty of real wood, but they differ significantly in structure, performance, and cost.
In this guide, we’ll break down the key differences, pros and cons, and help you decide which option is best for your home.
What’s the Difference Between Solid and Engineered Hardwood?
-
Solid hardwood flooring is made from a single piece of real wood, typically ¾” thick. It can be sanded and refinished multiple times over its lifespan.
-
Engineered hardwood flooring consists of a thin top layer of real wood (called the veneer) bonded to multiple layers of plywood or HDF underneath. This construction makes it more stable, especially in areas with humidity or temperature fluctuations.
Pros and Cons of Solid Hardwood Flooring
Pros
-
Long lifespan – Can be refinished multiple times (up to 4–6 times).
-
Classic aesthetic – Deep grain and natural character.
-
Increases home value – Seen as a premium flooring option.
-
Custom stain options – Easily sanded and stained to match design trends.
Cons
-
Sensitive to moisture – Prone to expansion and contraction in humid environments.
-
Not recommended for basements or concrete slabs.
-
More expensive – Higher material and installation costs.
-
Installation limitations – Must be nailed or stapled down, not suitable for floating floors.
Pros and Cons of Engineered Hardwood Flooring
Pros
-
More stable – Less prone to warping and cupping, ideal for kitchens, basements, and over radiant heating.
-
Easier installation – Can be glued, stapled, or floated.
-
More affordable – Typically costs less than solid hardwood.
-
Wider plank options – More flexibility with sizes and finishes.
Cons
-
Limited refinishing – Depending on veneer thickness, may only allow 1–2 sandings.
-
Quality varies – Cheaper products may have thin wear layers.
-
Not as long-lasting – Typically has a shorter lifespan than solid wood.
Where to Use Solid vs. Engineered Hardwood
| Room/Condition | Best Choice |
|---|---|
| Dry, climate-controlled spaces (e.g., bedrooms, living rooms) | Solid Hardwood |
| Basements or areas with humidity | Engineered Hardwood |
| Over radiant heat systems | Engineered Hardwood |
| On concrete slab | Engineered Hardwood |
| Renovations with height restrictions | Engineered Hardwood |
| Historic home restorations | Solid Hardwood |
Sustainability Note
Engineered hardwood uses less slow-growing hardwood than solid planks, making it a more eco-conscious option when sourced responsibly. Look for FSC-certified products if sustainability is a priority.
Which Hardwood Flooring Is Right for You?
Choose solid hardwood if:
-
You want maximum longevity
-
You’re installing above grade in a dry area
-
You prefer traditional installation and design flexibility
Choose engineered hardwood if:
-
You need stability in variable climates
-
You’re renovating over concrete or radiant heating
-
You want a budget-friendly option that still uses real wood
Need Help Choosing the Right Hardwood?
Whether you're remodeling a single room or building your dream home, we can help you find the perfect flooring for your lifestyle and budget.
Contact us at Focus Flooring in Peterborough today to have one of our experts guide you to the right option for your project.
How to Match LVP Floors with Your Cabinets, Walls, and Trim
LVP floors are a smart, stylish choice for today’s homes. With endless color and texture options, they offer the beauty of hardwood with more durability and less maintenance. But once you've chosen your perfect flooring, a big question remains:
How do you match your LVP floors with cabinets, wall colors, and trim for a cohesive look?
In this guide, we’ll walk you through expert tips on coordinating finishes, tones, and textures — so your home looks polished and professionally designed.
1. Understand the Undertones of Your LVP Floors
Before picking paint or cabinet colors, study the undertones of your LVP floors. Most fall into one of these categories:
-
Warm tones – golden, honey, red-brown, or beige
-
Cool tones – gray, ash, taupe, or driftwood
-
Neutral tones – balanced blends of gray and brown
Tip: Hold a white sheet of paper next to your flooring. This can help make undertones pop out clearly.
2. Coordinate Cabinets with Contrast
Matching cabinets exactly to your LVP floors can make your space feel flat. Instead, use contrast to create depth:
-
Warm LVP floors (like chestnut or caramel): Try white, cream, or olive-green cabinets.
-
Cool LVP floors (like gray oak): Pair with navy, charcoal, or soft blue cabinets.
-
Neutral floors: Almost anything works — but matte black or sage green is very trendy right now.
Bonus Tip: Two-tone cabinets (light uppers + dark lowers) pair beautifully with LVP floors.
3. Wall Colors That Work with LVP Floors
Wall colors should enhance — not overpower — your floors. Here’s how to get it right:
| LVP Floor Type | Recommended Wall Colors |
|---|---|
| Light oak or beige | Soft whites, sage green, pale blue |
| Gray or greige | Cool whites, dusty lavender, navy |
| Dark wood looks | Cream, warm white, tan, or blush |
Pro Move: Test samples on the wall next to the floor at different times of day.
4. Trim: Keep It Crisp and Classic
When in doubt, go white with trim. Clean white trim adds contrast, frames your flooring, and suits almost any style.
If you're feeling bold:
-
Use greige or mushroom trim for a softer, earthy vibe
-
Try black trim with light LVP floors for a sleek modern edge
5. Use Samples and Mood Boards
LVP floors come in a wide range of finishes, so use physical samples or digital tools to create a design board. Include:
-
A flooring swatch
-
Cabinet sample or paint chip
-
Wall color card
-
Trim paint sample
Tools like Canva, Pinterest, or real wood/paint swatches from your local hardware store can help you visualize everything together.
Final Thoughts: Let Your LVP Floors Lead the Way
Choosing the right combination of floors, cabinets, walls, and trim doesn’t have to be overwhelming. Let your LVP floors set the tone, and use contrast, balance, and texture to guide the rest.
With a little planning, your space will feel beautifully intentional — and totally you.

How to Protect Your Hardwood Floors from Muddy Paws This Spring
Spring brings sunshine, blooming flowers... and muddy paws.
If you have pets, you know the struggle is real — muddy footprints can quickly ruin the beauty and lifespan of your hardwood floors.
Don't worry! With a few smart tips, you can enjoy the season without stressing about damage.
In this guide, we’ll show you how to protect your hardwood floors from muddy paws this spring — and keep them looking flawless year-round.
1. Create a Pet Cleaning Station by the Door
Set up a small cleaning area near every entrance your pets use.
Stock it with:
-
A towel or microfiber cloth
-
A shallow water tray for rinsing paws
-
A pet-safe mat for wiping feet
Pro Tip: Teach your dog to "wait" while you clean their paws — it’ll save you tons of time (and mopping).
2. Invest in Durable Entryway Rugs
Entryway rugs are your first line of defense.
Look for rugs that are:
-
Waterproof or quick-drying
-
Non-slip to avoid accidents
-
Machine washable for easy cleanup
Best placement: Inside and outside every exterior door.
3. Use a Pet-Safe Floor Cleaner Regularly
Spring mud carries more than just dirt — it can hide salts, fertilizers, and chemicals that damage wood.
Clean floors frequently using a pH-neutral, pet-safe hardwood cleaner.
Avoid harsh chemicals like bleach or ammonia that can strip your floor’s finish.
4. Apply a Protective Sealant or Recoat
If your hardwood floors are due, spring is the perfect time to recoat.
A fresh layer of polyurethane protects against moisture, stains, and scratches.
Not sure if you need a new coat?
Try the water-drop test: If water soaks in quickly, it’s time!
5. Keep Pet Nails Trimmed
Long nails can dig into wood and cause scratches — especially when your dog runs excitedly inside after a walk.
Regular trimming (or professional grooming) keeps nails short, smooth, and floor-friendly.
Bonus: It’s healthier for your pet too!
Final Thoughts: A Little Prep Goes a Long Way
Protecting your hardwood floors from muddy paws this spring doesn’t have to be difficult.
With a smart cleaning routine, a few key supplies, and a little training, you can enjoy a clean, beautiful home — and happy pets.